REALBasic Application Development - Part 3


Font Viewer
In this tutorial we will be building a more useful application, which we'll name "Font Viewer". This will be a font viewing utility for older Mac OS systems. This app will be targetted towards 68k & PPC systems, so we will need to build this in REALBasic 3.5.2 (which was the last version that supported 68k compilation).

Stage 1 - Building the user interface
Create a new project in REALBasic, and rename the default window to MainWindow. Create another window (File > New Window) named AboutWindow which we will use to display general information about the application.
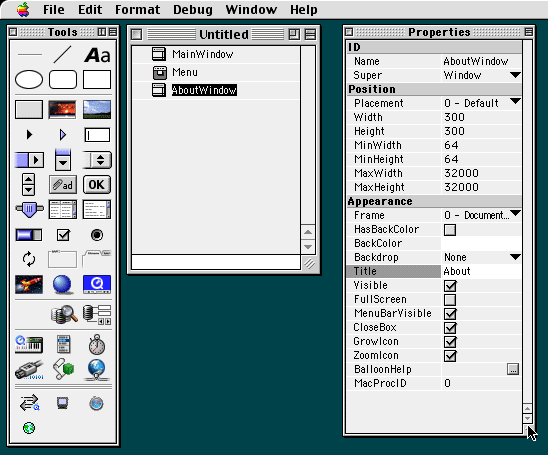
We'll start this project by adding all of the required controls before adding any functionality.
Open the MainWindow and add the following controls, which will be used to allow the user to select a font, apply a style, and edit the display text:
Placard (to place the app logo and details inside)
Canvas (sized 32x32 to display the app logo)
PushButton (to open the AboutWindow)
PopupMenu (for font selection)
LittleArrows (to cycle through fonts)
PopupMenu (for style selection)
EditField (for the display text)
EditField (fot the size input)
LittleArrows (to cycle through font sizes)
EditField (for the styled font display)
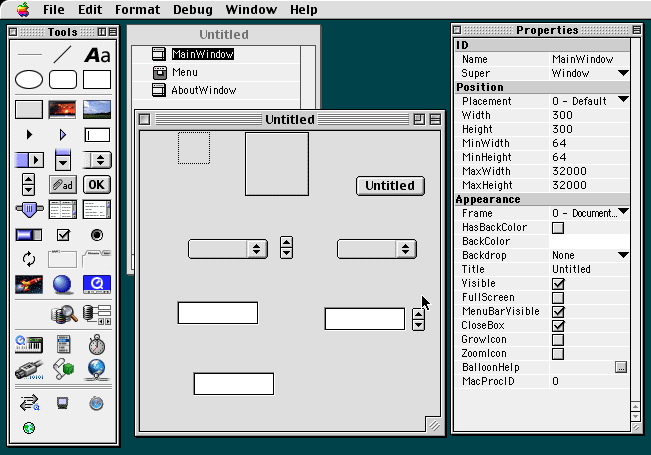
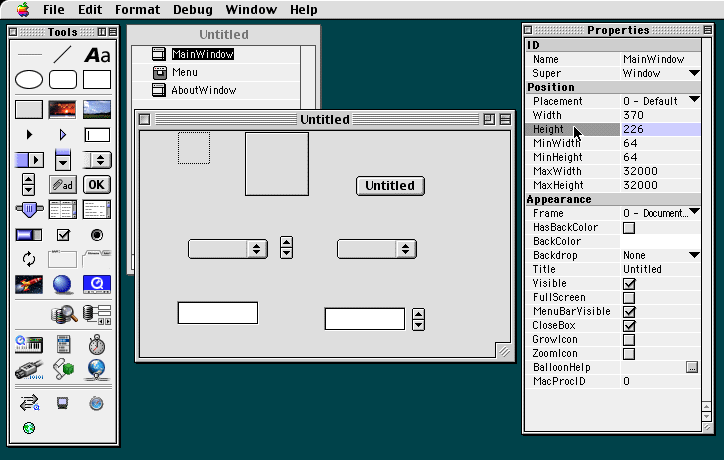
Things look pretty messy, so now is a good time to define a window size, and add some labels to the controls. Set the window width to 370, and the window height to 226.
Add some labels and arrange the controls into better positions to resemble the layout below:
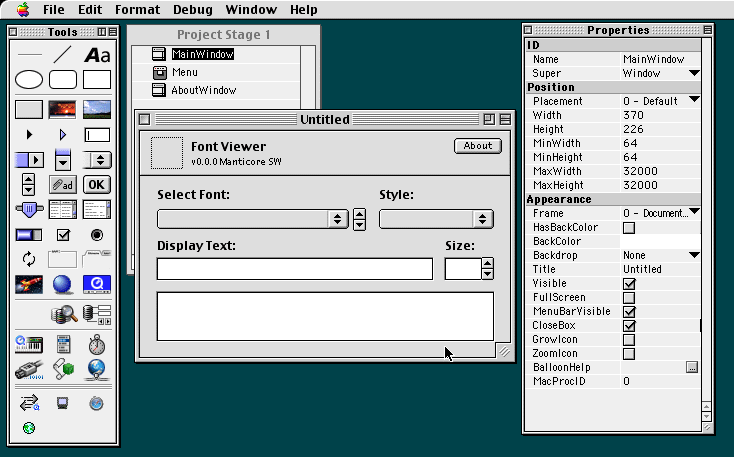
Once you have the layout finished, you should give some of the controls names so they can easily be targetted when we start adding functionality. Apply these names to the following controls:
The Select Font PopupMenu: FontMenu
The Style PopupMenu: StyleMenu
The Display Text EditField: TextValue
The Size EditField: DisplaySize
The styled font display EditField: DisplayField
The app version number label/StaticText: MainVersionLabel
Now is a good time to lock the positioning of certain elements, so they move, grow and fit correctly if the window is expanded. Apply the following rules to these elements in the Properties window:
Placard1: LockLeft = True, LockRight = True
PushButton1: LockRight = True
Style label/StaticText: LockRight = True
Style Menu/PopupMenu: LockRight = True
Size label/StaticText: LockRight = True
DisplaySize: LockRight = True
LittleArrows beside DisplaySize: LockRight = True
LittleArrows beside FontMenu: LockRight = True
FontMenu: LockLeft = True, LockRight = True
TextValue: LockLeft = True, LockRight = True
DisplayField: LockLeft = True, LockRight = True
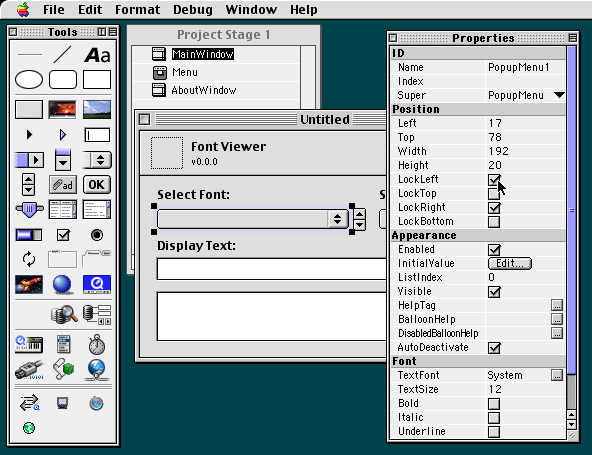
Run the app and try resizing the window. The controls should stretch/fill the window as it grows/shrinks. Once that's setup correctly, the UI is complete for the main window.
Now open the About window and add the following controls:
Canvas (sized 32x32 to display the app logo)
StaticText (to display the application's name)
StaticText (to display the application's version), name this AboutVersionLabel
Separator (cosmetic purposes)
StaticText (to display your name)
Disable the GrowIcon in the Properties window, as this window doesn't need to expand. Also, disable the Visible flag, as this will result in the About window being displayed every time the application opens.
Arrange the controls and set an appropriate window width/height so it looks something like the following:
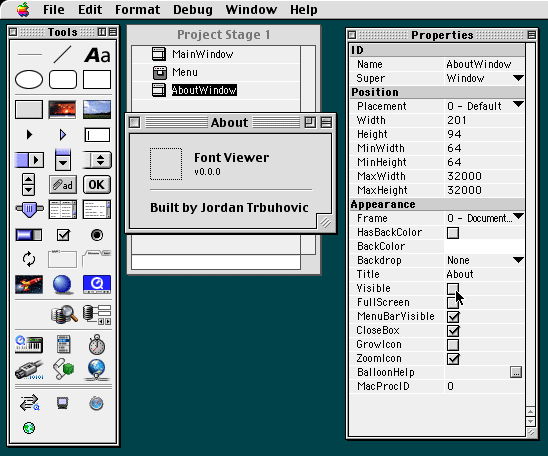
Now in the Project window, select the MainWindow and change the Placement value in the Properties window to Main Screen. This makes the main application window open at the vertical and horizontal center of the screen when it's launched, rather than at the top left corner. Do the same for the AboutWindow.
The user interface is now complete and we can start adding functionality. Open the MainWindow, then double click on the About button. Within the PushButton's Action subroutine add AboutWindow.Show. This sets the About button's action to open the AboutWindow. Press Command + R to build and run the application, then test the button. When you're done, press Command + Q, or quit the application to return to REALBasic.
We should also make the AboutWindow accessible from the Apple menu. To do this, go to the Project window, and open the Menu. Click the Apple menu, then click on the empty menu item so you can start defining a new menu option. With the empty item selected, set the Name value to AboutMenuItem and the Text value to "About" in the Properties window.
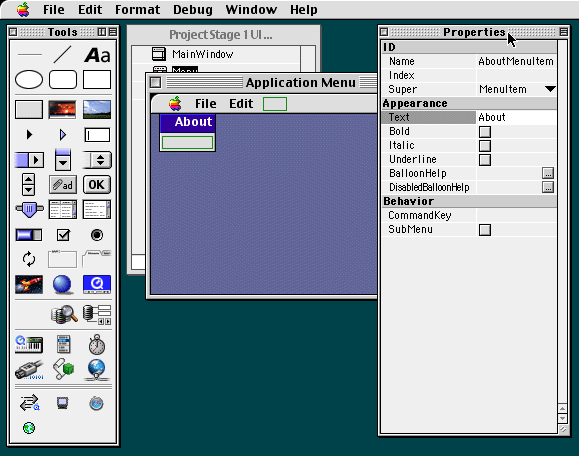
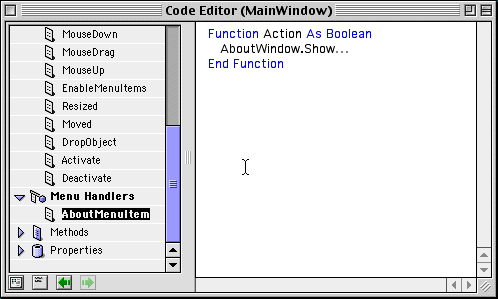
Close the application Menu window, open the MainWindow, then double click on the window background which will open the window's Code Editor. From the Edit menu, select New Menu Handler, then select the AboutMenuItem you created.
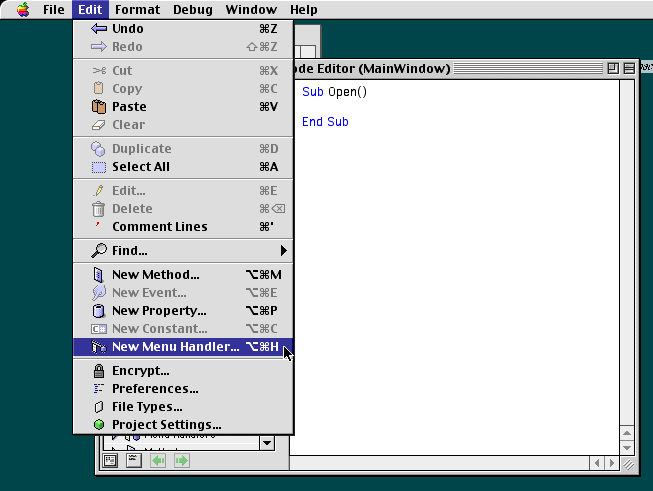
This creates a menu handler within the main window where you can add AboutWindow.Show to the menu item's action. Add AboutWindow.Show to the menu handler's Action function.
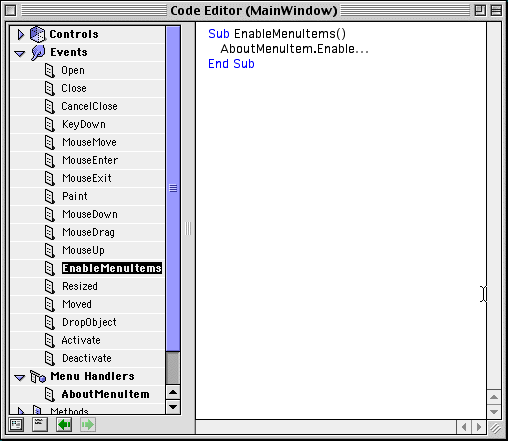
Menu items are disabled by default and need to be enabled within the EnableMenuItems event of the main window. Within the EnableMenuItems subroutine, add AboutMenuItem.Enable.
Stage 2 - Adding Functionality
Now that we have the core user interface, we need to populate all the fields with default values when the application opens. To start, open the MainWindow, double click on the window background to open the Code Editor.
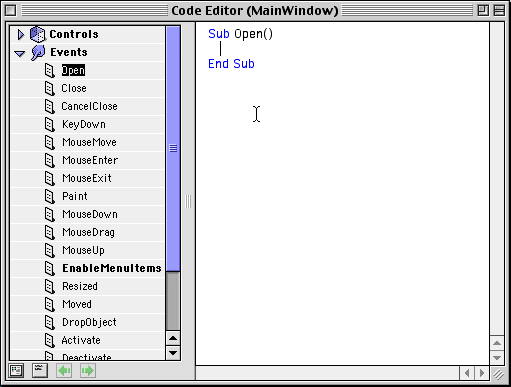
A good place to perform the app initialisation is inside the window's Open event.
Since we display the App version in both the main window and the About window, it makes sense to only define this once and populate the text labels from the single source. Otherwise if you change the version in the future, it's more cumbersome and error-prone updating it in multiple places.
Go back to the Project window and create a new Module from the File menu, and name it "Globals".
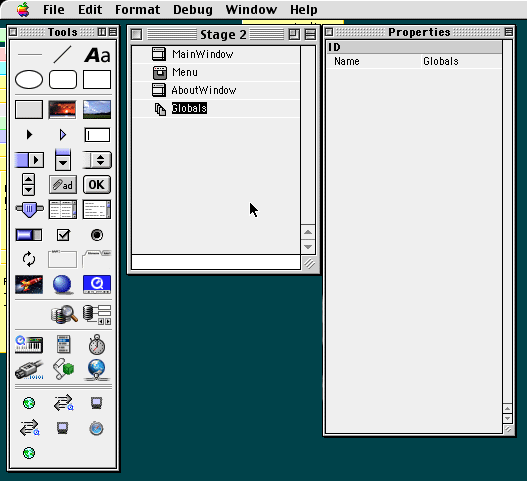
Open the Globals module and create a new constant with Command + Option + C. Name it "AppVersion", set the type to String and set the value to "1.0.0".
While we're defining global variables, create a Property with Command + Option + P and add CurrentTextSize As Integer. This will hold the user's current chosen text size, which changes and is why it's defined as a Property rather than a Constant.
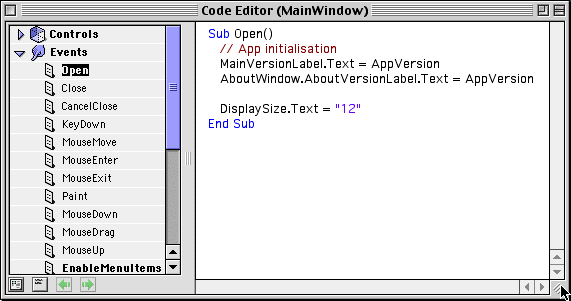
Go back to the MainWindow's Open event and add the following:
// App initialisation
MainVersionLabel.Text = AppVersion
AboutWindow.AboutVersionLabel.Text = AppVersion
This sets both text labels to the value assigned to the AppVersion constant. Updating the constant updates both labels whenever the MainWindow is opened.
We also need to set a default text size in the DisplaySize input. Within the MainWindow's Open event, and add the following:
CurrentTextSize = 12
DisplaySize.Text = Str(CurrentTextSize)
First we assign the Property CurrentTextSize a value of 12, but to use it within the DisplaySize EditField control (which only takes a text value), we must convert the Integer value of CurrentTextSize to a String, so it can be displayed in the EditField.
Run the application with Command + R to check that these values are being displayed.
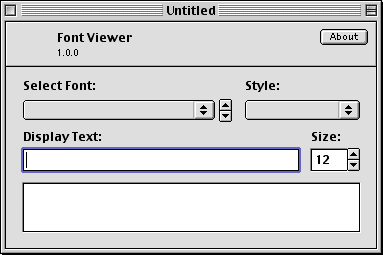
Close the Code Editor and go back to the Main Window.
Select the TextValue EditField, and in the Properties window add this text to the Initial State > Text field:
"The Quick Brown Fox Jumped Over The Lazy Dog"
This will be the default text displayed for previewing fonts.
Double click on the LittleArrows control beside the DisplaySize EditField. For the Down event add the following code:
If CurrentTextSize >= 2 Then
    // Don't allow decrementing below zero
    CurrentTextSize = CurrentTextSize - 1
    DisplaySize.Text = Str(CurrentTextSize)
Else
    // If decrement would be less than zero, set the size to 1
    CurrentTextSize = 1
    DisplaySize.Text = Str(CurrentTextSize)
End If
This gives the down arrow functionality so it decrements the font size if it's greater than or equal to 2, and ignores the decrement and sets the size to 1 if the current value is already 1. We don't want a font size set to 0 or a negative number, so we need to ensure that guard is in place.
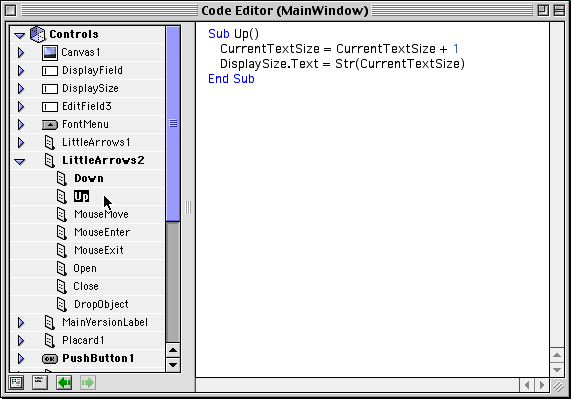
Now click on the Up event of the LittleArrows and add the following:
CurrentTextSize = CurrentTextSize + 1
DisplaySize.Text = Str(CurrentTextSize)
We don't need to be as careful when increasing the font size because setting a large size is only going to be an inconvenience the user rather than causing any real issues.
Run the app and check that the size value adjusts when the arrow buttons are clicked.
Since we're using an EditField for the font size, we need to enforce some rules on input entry so only numbers can be entered, because any letters or other characters would be invalid input for a font size.
Double click on the DisplaySize control and add the following to the KeyDown event:
If Key >= "0" And Key <= "9" The
    Return False
End If

If Asc(Key) = 8 Then
    Return False
End If

Return True
When the KeyDown event is triggered, returning False allows the EditField to process the key normally. We return False for the numeric characters 0–9 so they are entered into the field, and for ASCII character 8 (the Delete/Backspace key) so users can remove a value. Returning True for all other keys consumes the event which prevents invalid characters from being entered into the field.
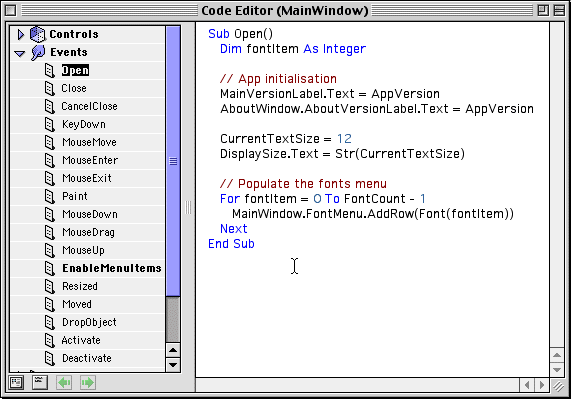
Now that we have text and a font size we should allow the user to set a font and style. Open the Open event of the MainWindow and add the following code:
Add the variable fontItem to the top of the event (above the existing initialisation code):
Dim fontItem As Integer

... Initialisation code
Add this code to the bottom of the event:
... Initialisation code

// Populate the fonts menu
For fontItem = 0 To FontCount - 1
    MainWindow.FontMenu.AddRow(Font(fontItem))
Next
This For loop iterates over all the fonts installed on the user's computer with the Font() function, and adds each item to the FontMenu. fontItem is the index (current item) within the system font array, and the For loop keeps iterating and adding each item until it gets to the end the end of the array/total number of items (FontCount). Since an array (which is like a list) starts at an index/position of 0, we need to subtract 1 from the total number.
Next, close the Code Editor and open the MainWindow, then select the FontMenu. In the Properties window click the Edit button to assign an initial value of "Geneva". This is what we will use as the default font.
Run the app and check that the FontMenu is populated with the system's fonts.
Double click the LittleArrows control next to the FontMenu and for the Down event add the following:
If FontMenu.ListIndex < FontMenu.ListCount Then
    FontMenu.ListIndex = FontMenu.ListIndex + 1
Else
    FontMenu.ListIndex = FontMenu.ListCount
End If
This tells the down arrow to go downwards through the font list and set the current value to the current index plus 1, as long as the current index isn't equal to the last item in the list (FontMenu.ListCount).
Now select the Up event and add the following:
If FontMenu.ListIndex > 0 Then
    FontMenu.ListIndex = FontMenu.ListIndex - 1
Else
    FontMenu.ListIndex = 0
End If
This tells the up arrow to go upwards through the font list and set the current value to the current index minus 1, as long as the current index isn't already the top-most item.
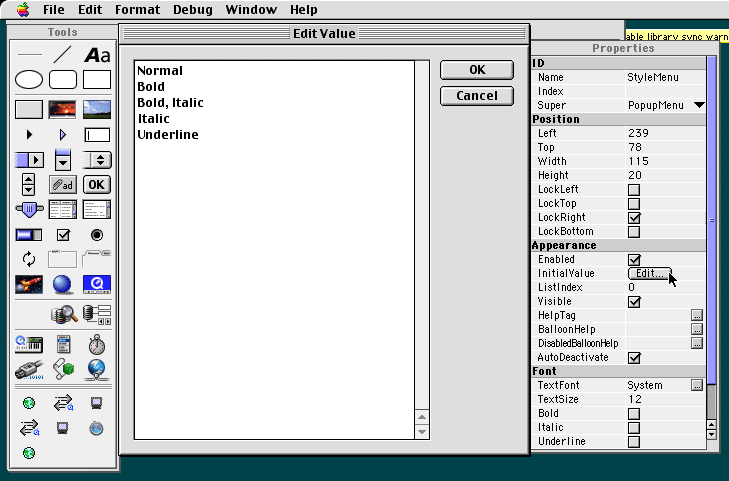
The last control that needs configured is the StyleMenu. For now we can keep the styling simple and just add basic styles as the defaults. Close the Code Editor and within MainWindow, select the StyleMenu control. In the Properties window click Edit for the InitialValue and paste the following:
Normal
Bold
Bold, Italic
Italic
Underline
These are the only styles we'll allow, since by using a PopupMenu control we can only apply one style at a time.
Stage 3 - Final Touches
The core user interface and functionality is now built, all that remains is functionality to display the example text with the font and styles applied.
Open the CodeEditor for MainWindow and create a method/subroutine named DisplayFont with Command + Option + M. This method does not need to take any parameters or return any value, it's pure function is to read the settings applied and to render the text within the DisplayField control.
Paste the following code into DisplayFont:
DisplayField.Text = TextValue.Text // Set the text value of DisplayField to the current value of TextValue
DisplayField.TextSize = Val(DisplaySize.Text) // Sets the TextSize property of DisplayField to the chosen size in DisplaySize. The `Val()` function converts the string value into an integer.
DisplayField.TextFont = FontMenu.Text // Sets the TextFont property of DisplayField to the user's selected font name in FontMenu.

// This is a rather inefficient method of setting styles, but you can hopefully improve this based on learnings from the previous tutorials.
//
// This logic reads the value of the StyleMenu, toggles the appropriate style
// flags of DisplayField, and disables any other styles that were previously // applied.
If StyleMenu.Text = "Bold" Then
	DisplayField.Bold = True
	DisplayField.Italic = False
	DisplayField.Underline = False

ElseIf StyleMenu.Text = "Italic" Then
	DisplayField.Italic = True
	DisplayField.Bold = False
	DisplayField.Underline = False

ElseIf StyleMenu.Text = "Underline" Then
	DisplayField.Underline = True
	DisplayField.Italic = False
	DisplayField.Bold = False

ElseIf StyleMenu.Text = "Bold, Italic" Then
	DisplayField.Bold = True
	DisplayField.Italic = True
	DisplayField.Underline = False

Else
	DisplayField.Bold = False
	DisplayField.Italic = False
	DisplayField.Underline = False
End If
This method is what will be used to display and apply fonts within the preview area, but it needs to be called whenever changes are made to trigger the rendering.
Call DisplayFont in the following locations:
MainWindow's Open event (at the end after all of the initialisation code):
... Existing initialisation

// Initialise the text fields/font display
DisplayFont()FontMenu's Change event:
DisplayFont()StyleMenu's Change event:
DisplayFont()DisplaySize's TextChange event:
DisplayFont()TextValue's TextChange event:
DisplayFont()Run the app and test the functionality
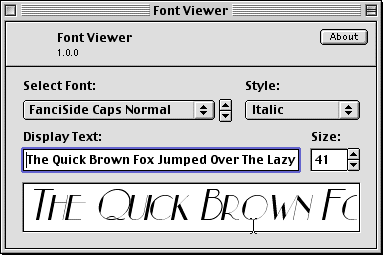
That's the full functionality of the application complete!
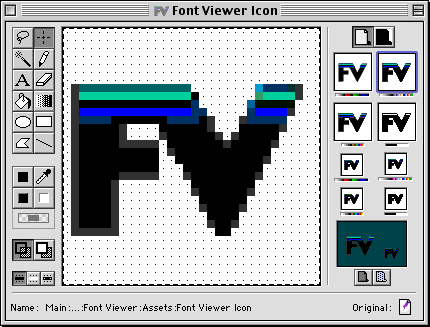
Lastly, it's time to add some personalisation to the app. I like to make my icons in Icon Machine (v2.0), it has an excellent editor and makes pixel art/icon design very easy.
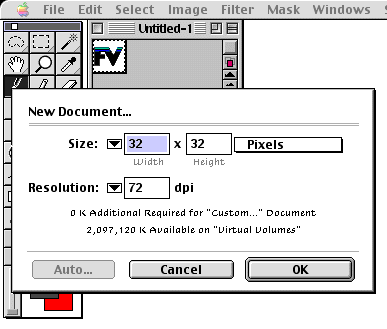
Once your icon is complete, select all with Command + A in the icon canvas, copy it, and paste it into a new 32x32 document in Pixel Paint Pro 3.0. After pasting, press Command + R to drop the selection. From the File menu click Save As... and change the type to PICT. When the save options appear, select Paint Only for the layer options and the appropriate colour set.
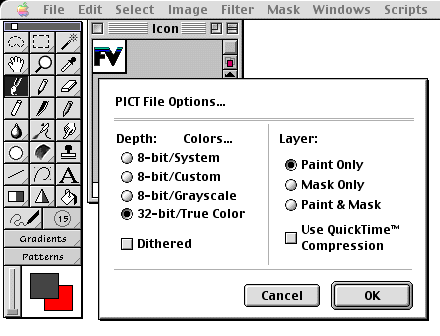
Go back to REALBasic and in the Project window create a folder named Assets from the File menu.
Drag the PICT file you saved into the Assets folder, then select it and set the Transparent property to White in the Properties window. This clips the white background of your icon and sets it as transparent.
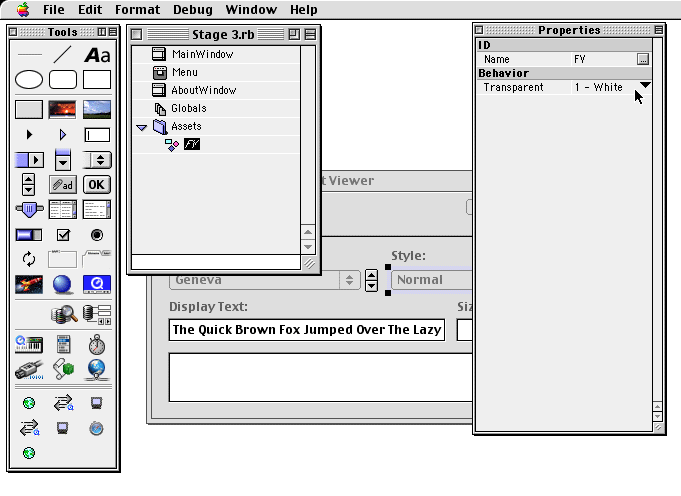
Now open the MainWindow, select the Canvas control at the top left and choose your icon image in the Backdrop property. Do the same in the AboutWindow.
Final steps
If you're building in REALBasic 3.5.2:
Click the File Menu > Build Application.
Find the icon file you created with Icon Machine and select it, then press Command + I.
Click the icon in the info window and press Command + C to copy the icon set.
Go back to the Build Application window in REALBasic, click the Icon square and press Command + V to paste the icon set. Doing this will apply the icon to your built application.
This is a very lightweight and simple application, so we don't need to increase the memory allocation, this is only necessary for larger applications.
Set the Get Info values to whatever you want your app to display, give the application a name, and choose which type of application you'd like to compile (68k, PowerPC, or both (FAT)).
Finally press the Build button, and your application will be built alongside wherever you have the project file saved.
Sometimes REALBasic 3.5.2 doesn't apply the icon at build time, so you may need to do this manually after it's built.
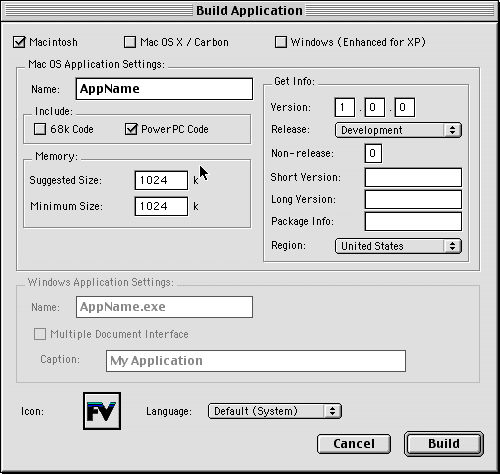
The same steps apply to REALBasic 5, but the build settings are applied seperately in File > Build Settings, and building is done in File > Build Application.
Congratulations, your application is complete!
Bonus Challenge
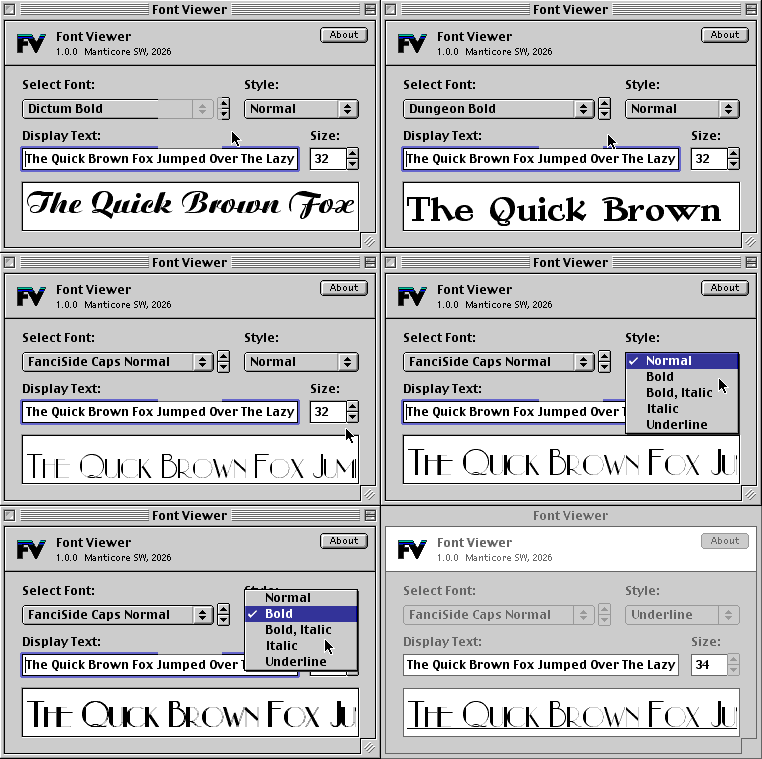
Instead of using a Popup Menu control for the font styles, try using checkboxes so you can apply more than one style at once.


Post a Comment






Replying to . Cancel reply